
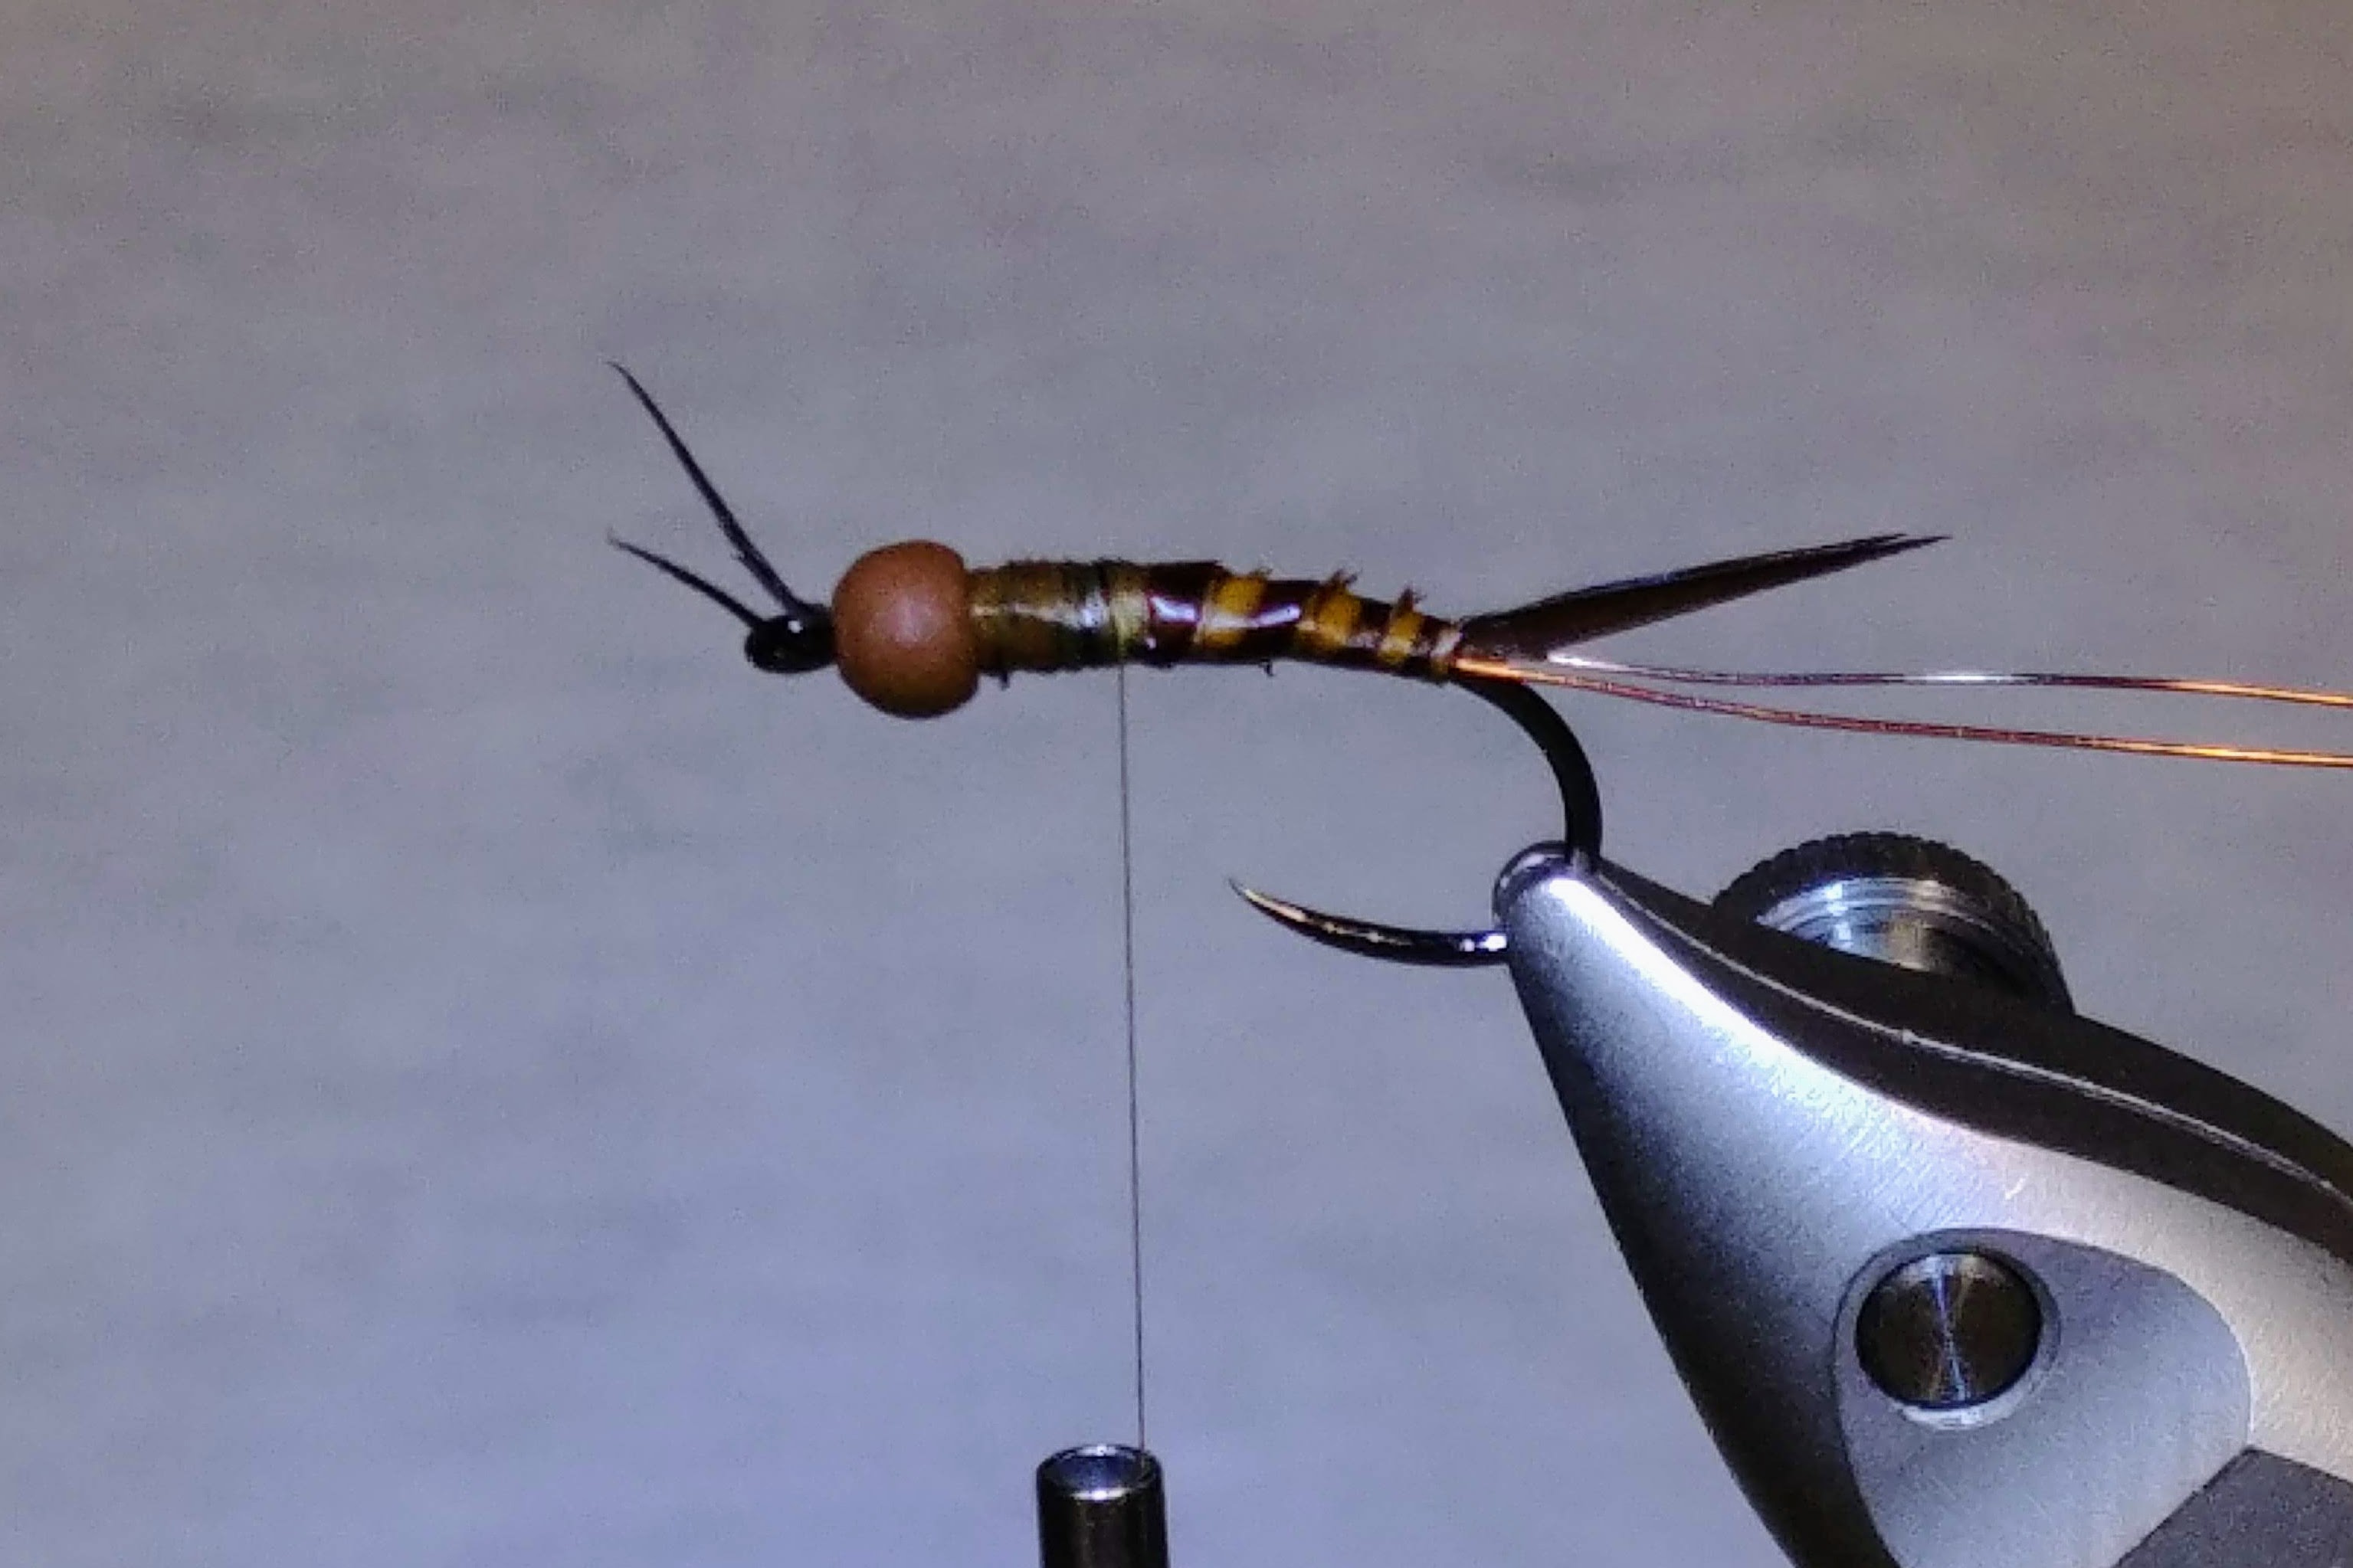
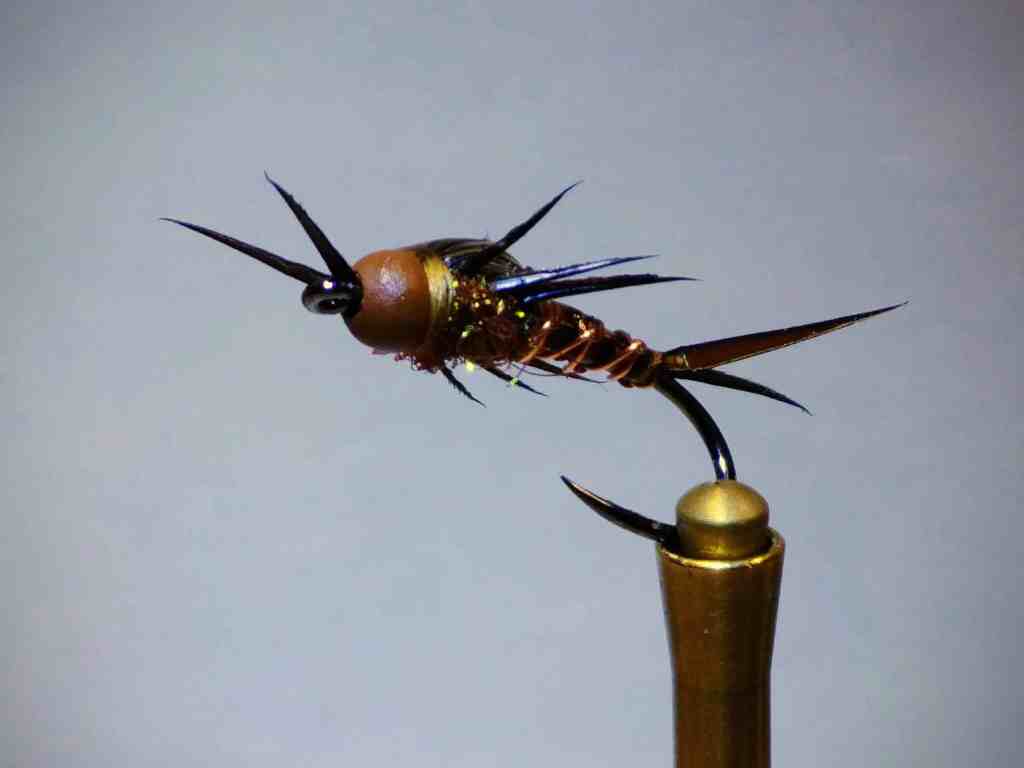
I love this fly. Not only the way it looks when it is all done but the process of making it. There’s something for me when the turkey biots lay nicely on the body with woven wire over top. The Turkey Quill backing and Pheasant Tail Ice Dub under the thorax add just the right touch. The goose biots flared out as legs and antenna. They put it over the top!
The only issue I have with this fly is that I like the way it looks in my box too much. Therefore, I rarely take it out when fishing. This version tied on the Firehole Outdoors 718 is no exception. The tactical wide gape hook makes it a deadly fly if it ever makes it on my line.
Step by Step Matte Brown version:

Start by sliding the bead onto the hook and fixing it into the vise.
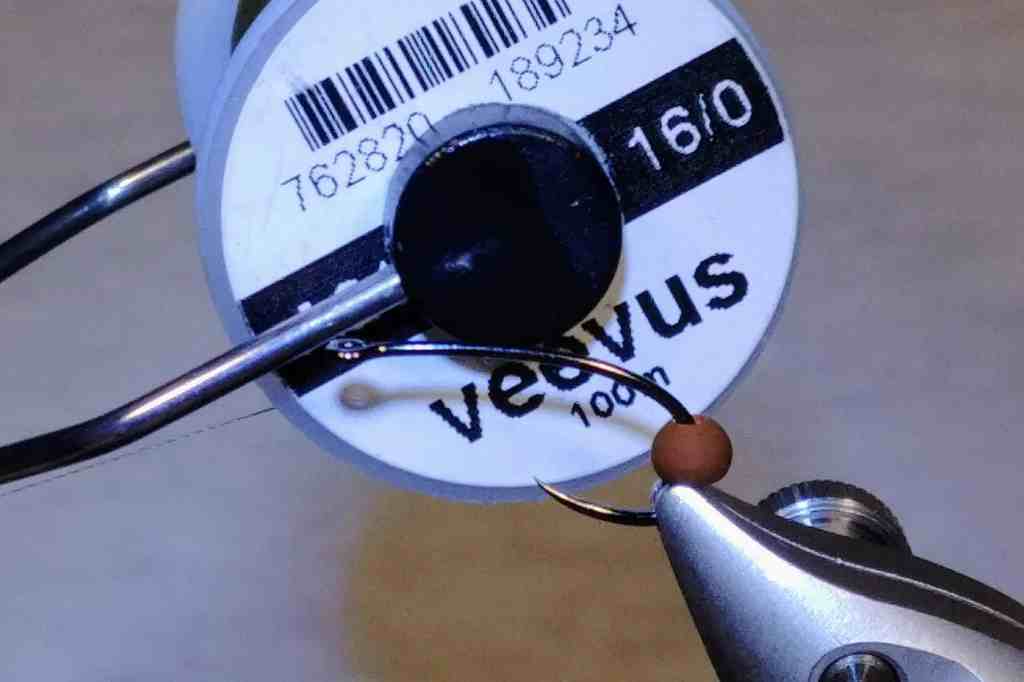

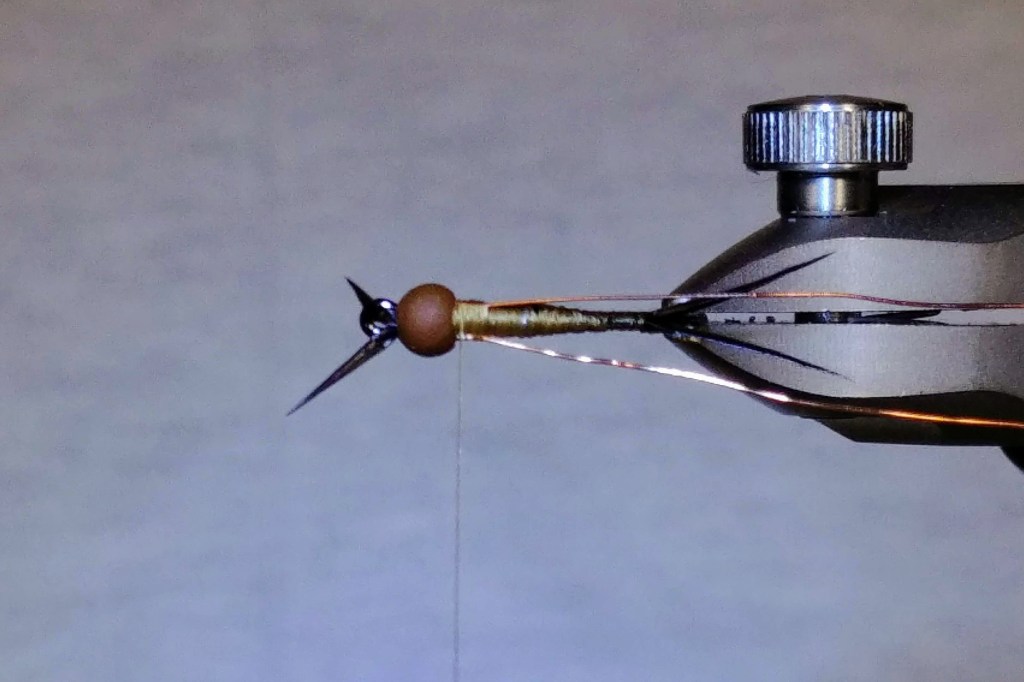
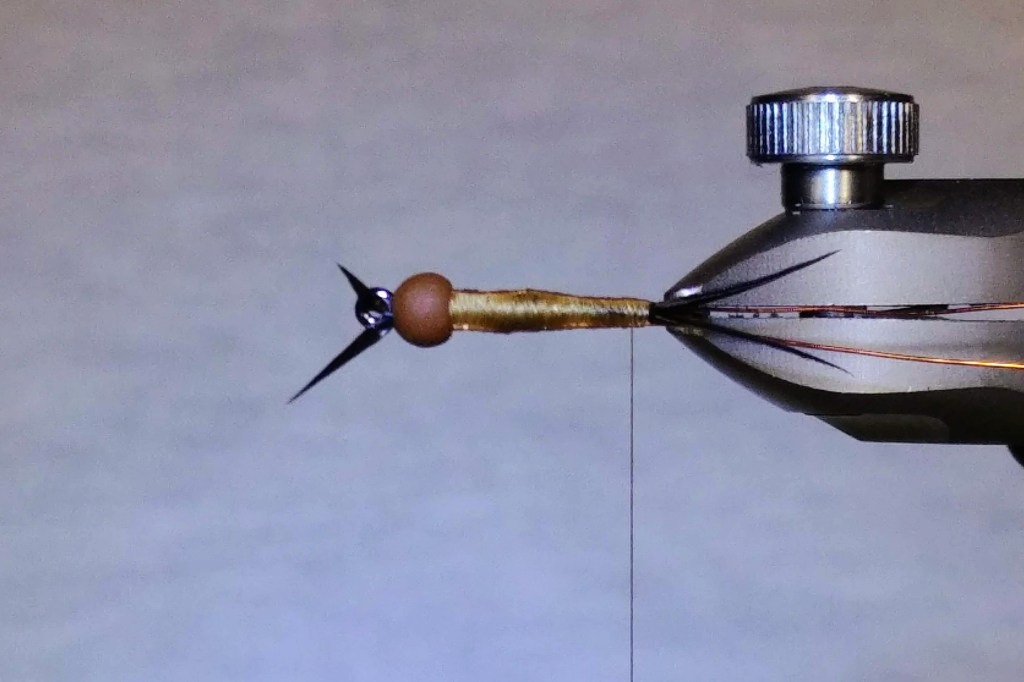
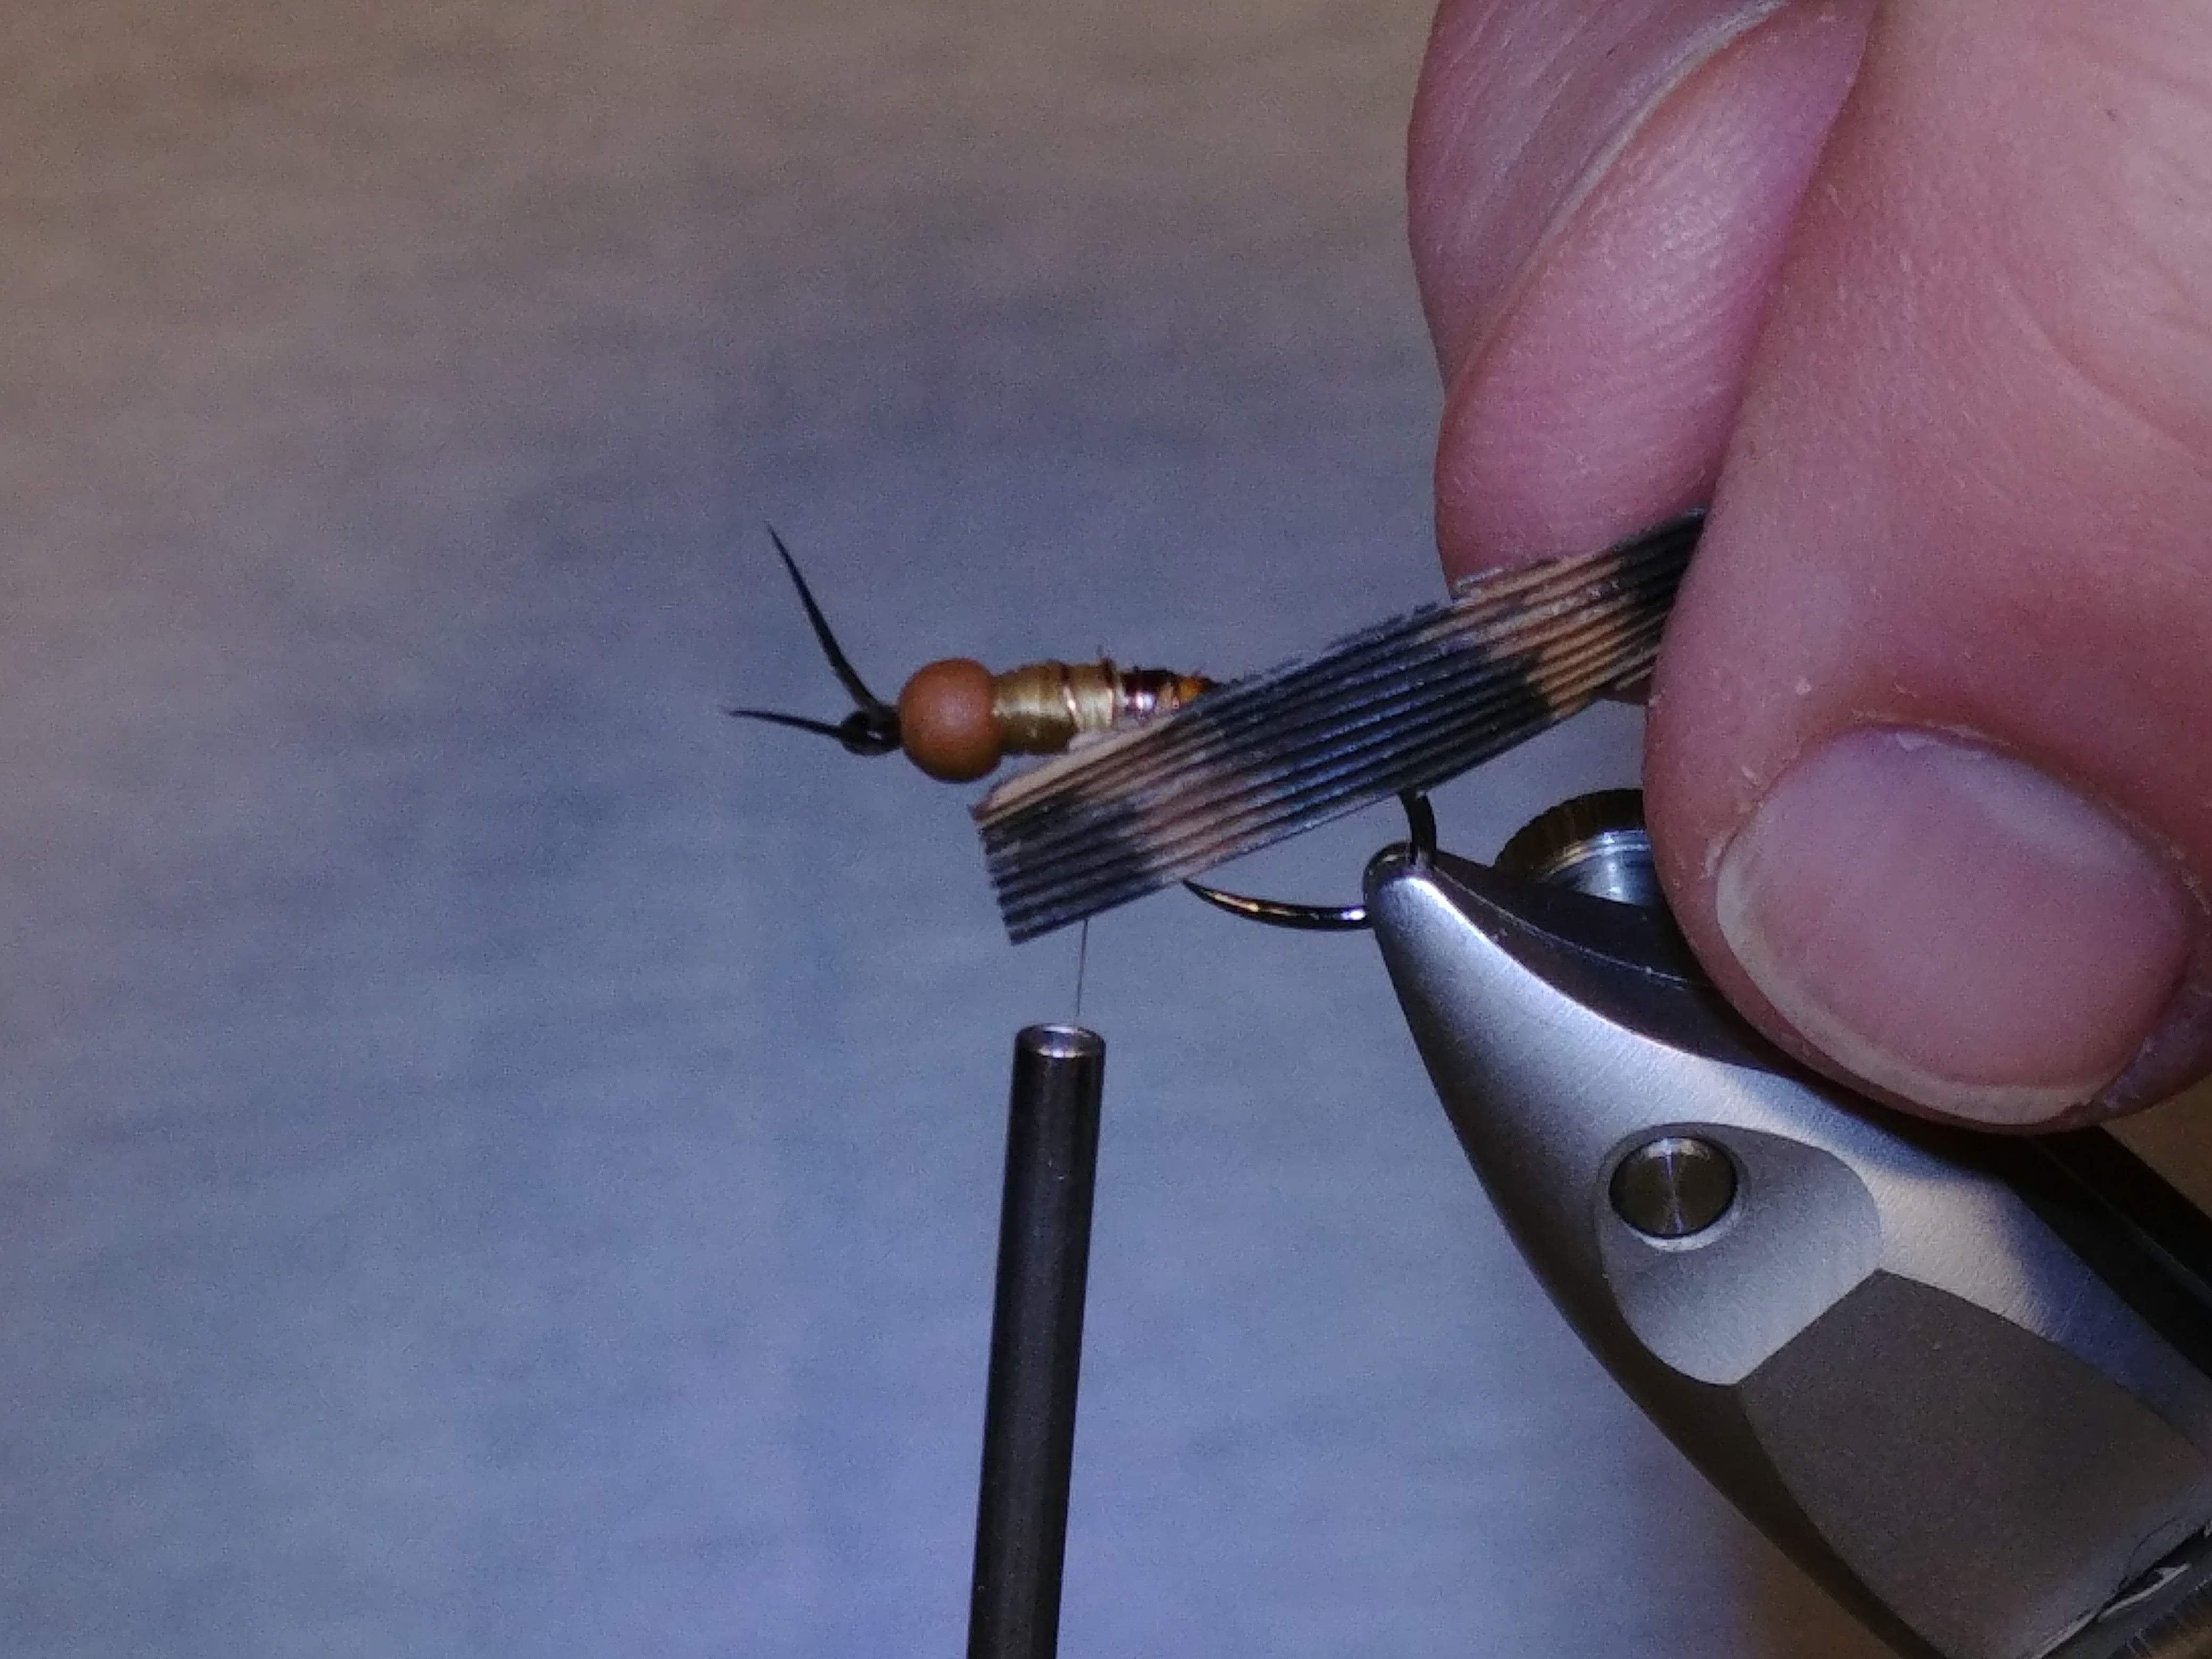
Push the bead back down the bend of the hook. Start the 16/0 thread behind the eye. Prepare to tie in the Goose Biot antenna.


Tie-down two goose biots. I like to crisscross them right behind the eye and tie them in individually. Make sure they are equal in length. Whip finish off and slide the bead back behind the eye, covering your work.

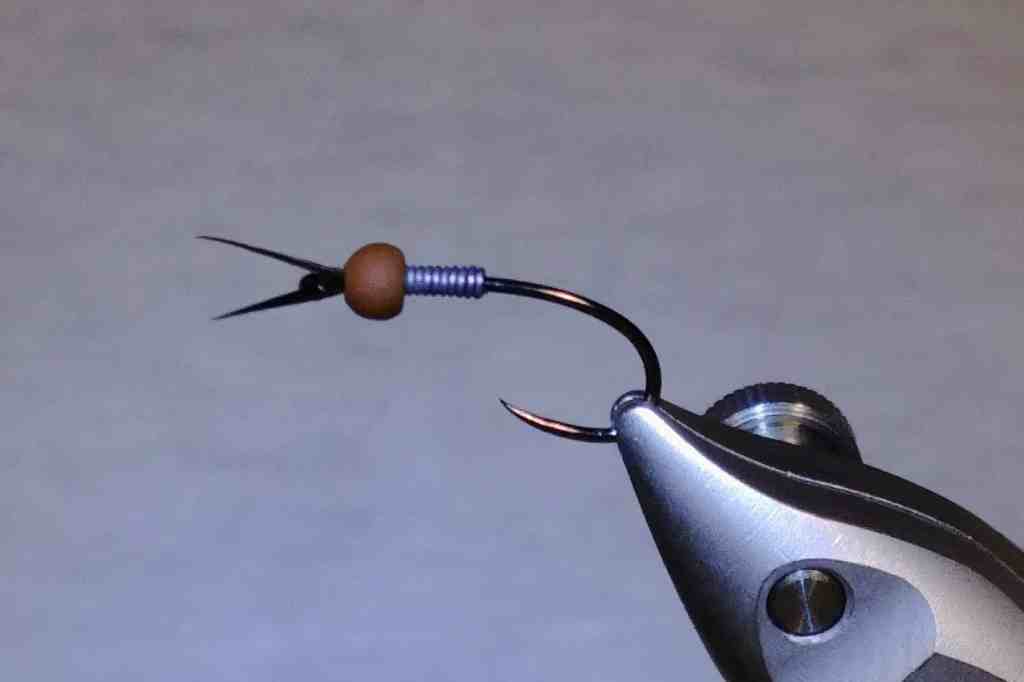

The next step, is to add some weight. I like to wrap about ten wraps of .015 for the size 14 I am tying in these images. Using the 12/0 Thread now, create a dam behind the wire and secure it all into place. Keep in mind you want a smooth transition from the abdomen to the thorax (where the lead wire is now).


On to the tail. Tie in two goose biots flaring in opposite directions just short of the length of the hook shank. I like to trim my butt ends. This way, when tied in, they lay flat right up behind the lead wire. This helps to smooth the overall body and taper.
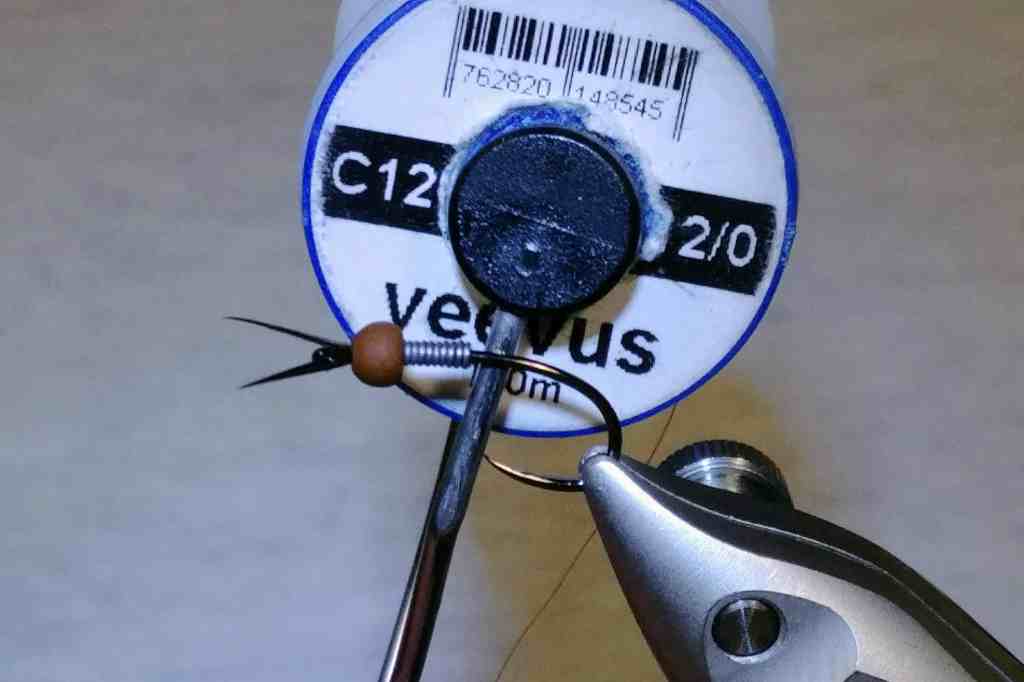
Add two strands of UTC Ultra Wire on opposite sides of the hook. I tie mine in the length of the body, to help keep a smooth working space. Tying them in on either side helps to create a flat profile. You can see in the second image above it helps to create a very buggy profile


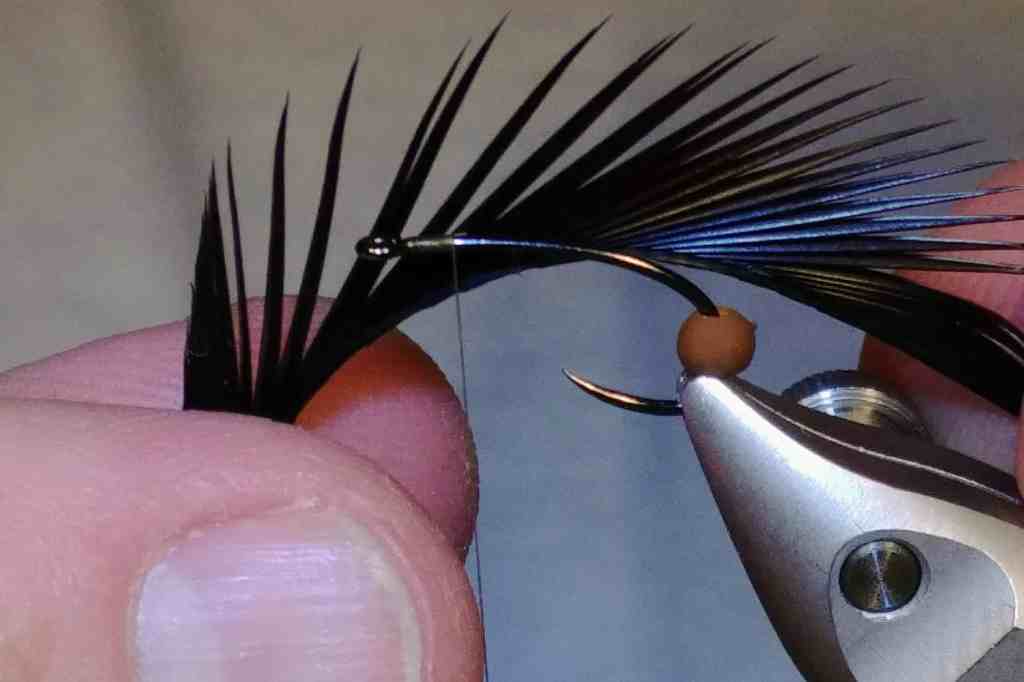
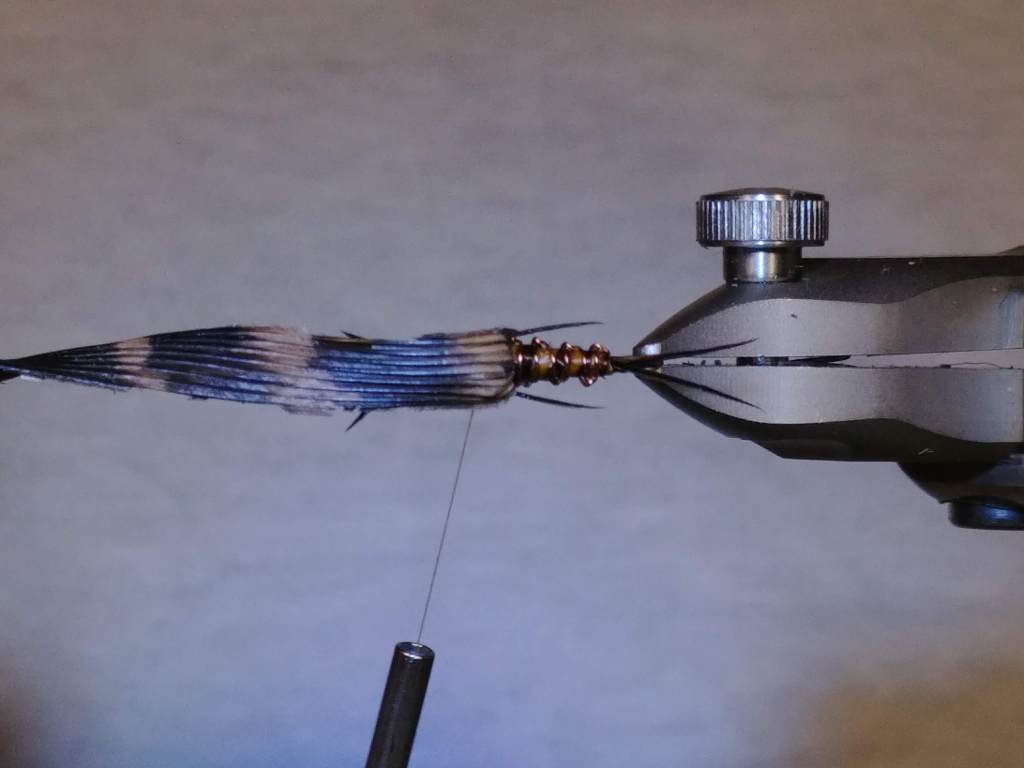
Now for the Turkey Biots! I love Turkey Biots for some reason. In the picture above you can see that both sides of the quill are not equal. The side that lays flat has much more durable and constant biots to use. They also are a little more vibrant and two-toned in color. Tie in a single biot with the bevel facing up on the top of the hook shank.
Wrap the biot so that the beveled side folds over and lays down against the hook. Each wrap should be just in front of the previous. Make sure to cover all thread wraps. Also, try to create segmentation. The natural two-tone of the biot is your guide for this. Capture the biot and make thread wraps back to where you want your thorax to start. Typically for me, it is about one-third of the body. When I go to tie in my backing material I will usually move back beyond that slightly.


Start the weaving process with the two strands of wire. Decided what color you want on top and what color on the bottom. They will stay in those locations as you wrap. Basically, you pull one strand under the body perpendicular to the hook shank. With the other strand wrapped around the first and back over the top. Repeat this process moving toward the bead. Keep in mind you want each connection point between the wires to be on each side of the hook shank. It is easy to get skewed and will cause frustration if you continue to weave.
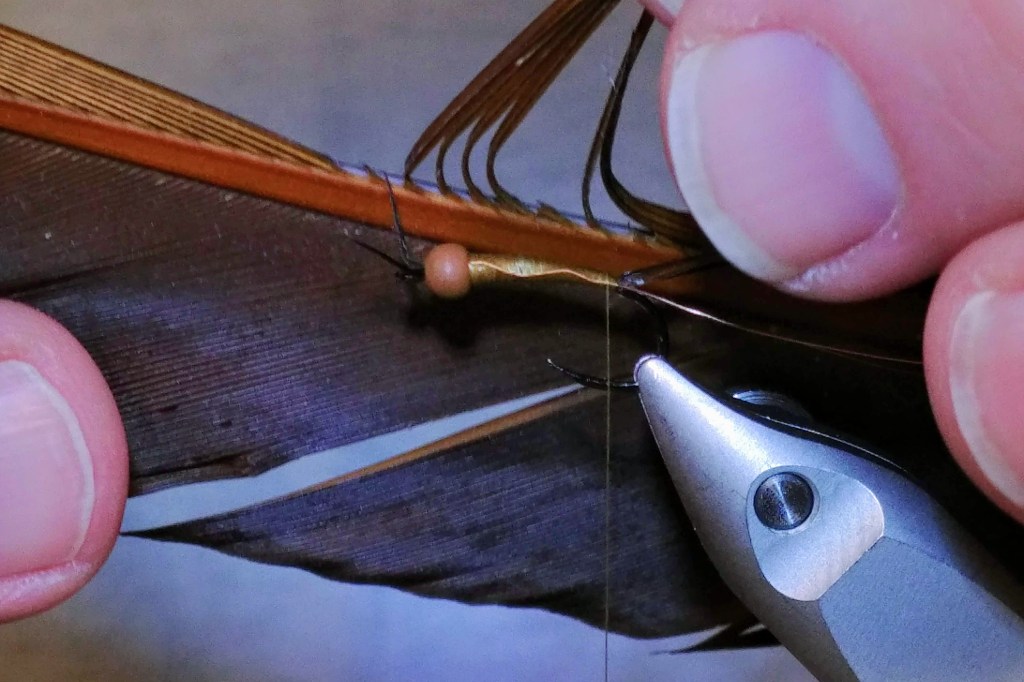
Select some Turkey feathers off the quill. For this size, I am using about eight in total. Before I begin tying this fly, I prep a Turkey Feather with super glue. This helps it keep its rigidity when tied to it but is not totally necessary. Tie in the Turkey feathers with the shiny side facing down. Leave them loose towards the back of the fly.


Use a very small amount of Ice Dub. Add a small amount as a prop for the first set of biots.

Add the first two biots. I tie these in one at a time on either side. This time you want the bevel to face inward. Measure the existing abdomen as a guide to stay consistent.


Repeat the dubbing and goose biots process two more times. Pull the backing material over the top of and secure behind the bead and whip finish.


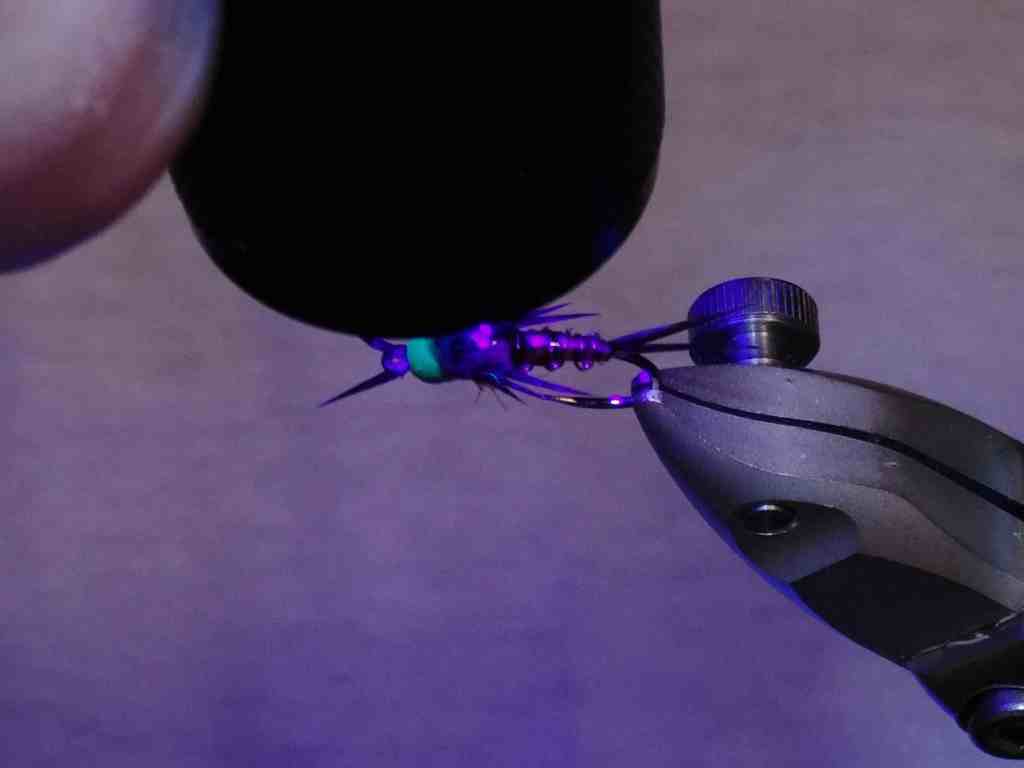
Using some UV fly finish create a wing casing over the backing material. I like using the Solarez thin because it isn’t so viscous. It won’t soak right in, and it’s easy to move around and work with. Turning your fly upside down if possible will help create a smooth bubble that you can quickly cure.

Recipe:
- Hook: Firehole Outdoors 718 6-12
- Weight: Lead Wire .015 – .020
- Bead: Firehole Matte Tungsten Almond Joy
- Thread: Veevus 16/0 Veevus 12/0
- Antenna Legs and Tail: Goose Biots
- Body: Turkey Biots with Small UTC Ultra Wire Woven
- Backing: Turkey Quill
- Thorax Dub: Ice Dub
- Uv Finish: Solarez Thin Hard
Leave a Reply